Walk into any detailing forum and you'll find the same question asked a hundred different ways: do I need to clay bar my car? The short answer, from someone who holds a chemistry degree and details cars for a living, is this — probably not as often as you think, and almost never as the first step. Clay is a brilliant tool. It's also an abrasive one, and in our studio it's the last resort, not the starting point. Here's the full picture, so you can decide what your paint actually needs.

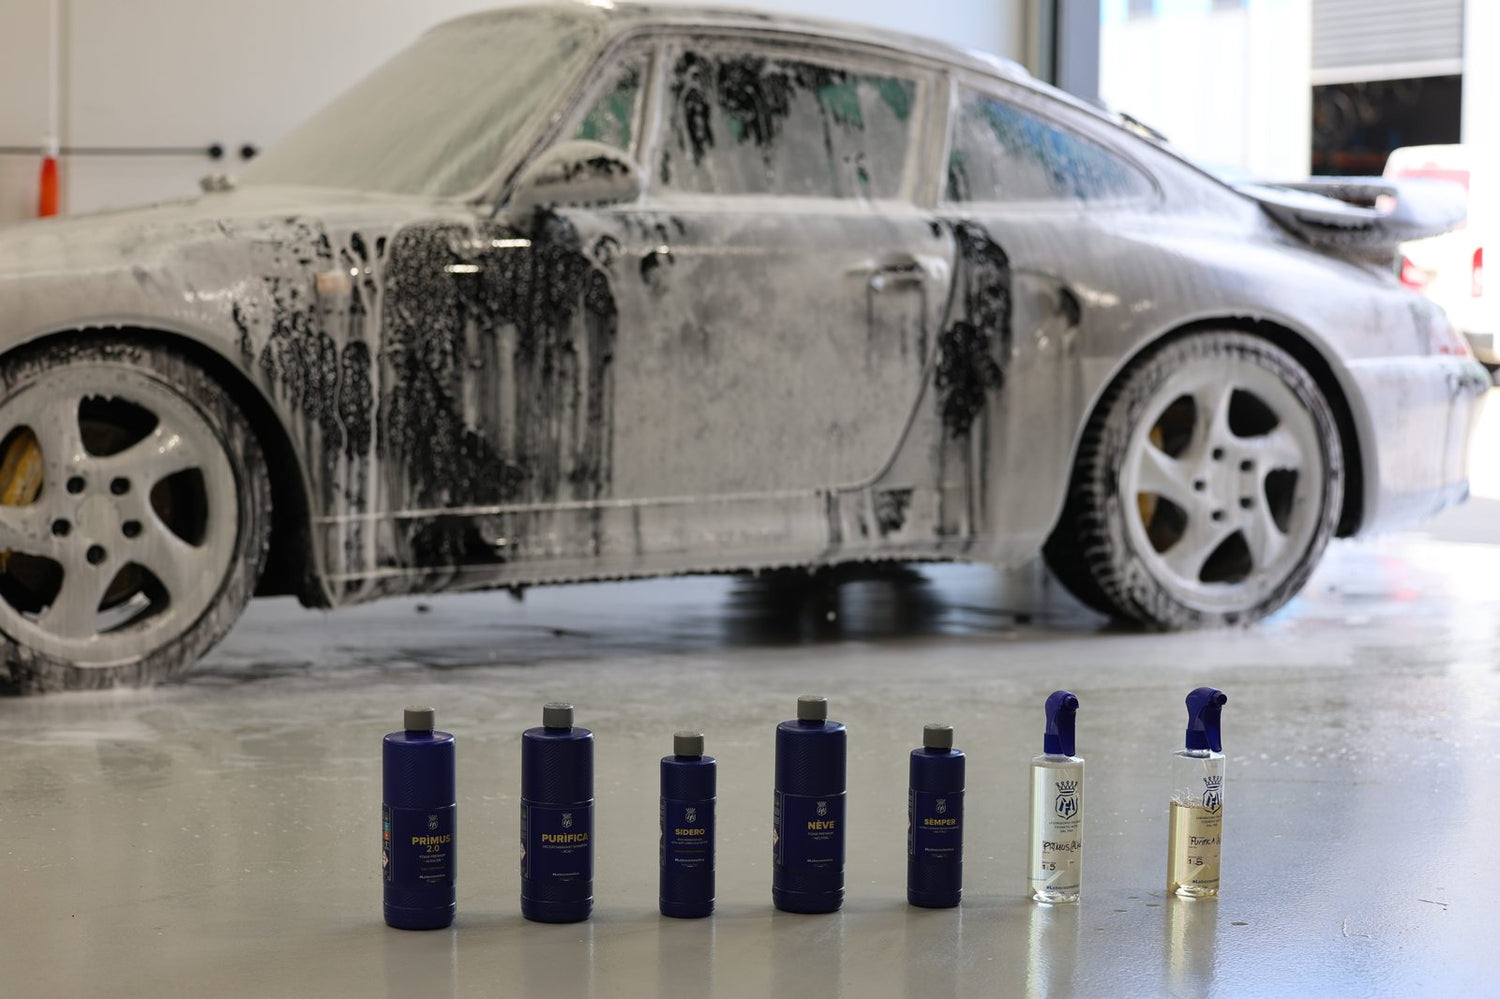
Full chemical decon in progress at the studio — the entire lineup from this article in one frame: PRÌMUS, PURÌFICA, SIDERO, NÈVE and SÈMPER.
What does a clay bar actually remove?
After a proper wash, paint can still feel rough — like fine sandpaper under your fingertips. That roughness is bonded contamination: particles that have embedded themselves into the clear coat and won't rinse off. The main offenders are ferrous particles — brake dust and industrial fallout, tiny fragments of hot iron that land on the paint and physically bite into it — along with tree sap, tar, overspray and mineral deposits from hard water.
Detailing clay is a Japanese invention, and it deserves the credit. It was developed in Japan in the early 1990s by Tadao Kodate, who was inducted into the International Detailing Association's Hall of Fame for it — every clay bar, mitt and towel on the market today traces back to his polymerised compound. It's no coincidence that Japan remains a benchmark for surface-preparation culture in detailing; it's the same tradition that gave us Soft99, whose super-fine clay we stock below.
A clay bar is an engineered abrasive compound that you glide across lubricated paint. As it passes over a bonded particle, it shears it off and traps it inside the clay. That's the whole mechanism — and it's important to understand, because it tells you two things. First, clay works on anything sticking up above the surface, regardless of what it's made of. Second, it works by mechanical abrasion. There is no chemistry happening here, just controlled physical force. Keep that in mind — it matters later.
How do you know your paint is actually contaminated?
Don't guess — test. The classic method is the plastic bag test: after washing and drying, put your hand inside a thin plastic sandwich bag and glide your fingertips over the paint. The bag amplifies texture your bare skin smooths over. Clean paint feels like glass; contaminated paint feels gritty, like fine grain. A nitrile glove over the paintwork works the same way, and some detailers do it during the wash with a gloved hand over the soaped panel. Horizontal surfaces — bonnet, roof, boot — always read worst, because that's where fallout lands.
If the panel feels like glass, stop. You don't need to decontaminate at all, and anything you do beyond washing is adding risk for no benefit.
Chemical decontamination comes first — always
Here's where our approach differs from most of the advice online. The internet says: wash, clay, polish. We say: decontaminate chemically, in the right order, and only reach for clay if there's anything left. In our experience, a thorough chemical decon removes most contamination without a single abrasive touch — and chemistry that dissolves a contaminant is always gentler on your clear coat than force that tears it off. This is the exact sequence we run in the studio.
Step one: alkaline pre-wash — on a dry car. We start with Labocosmetica PRÌMUS 2.0 — pH 11, no free caustic salts, the world's first VDA-certified pre-wash — foamed directly onto a dry car. That's deliberate chemistry, not impatience. Rinsing first dilutes the product the moment it lands, and the water film left on the panel stands between the surfactants and the organic soils they're there to encapsulate — traffic film, oils, bug residue. Applied to dry paint, the foam meets the contamination at full working strength. Allow it to dwell, then rinse off.

Step one in practice: foam hits the dry panel at full working strength.
Step two: the acid pass. Next comes PURÌFICA, foamed on — pH <3 at working dilution, built on buffered noble acids with no hydrofluoric acid and no ammonium bifluoride, and VDA certified like its alkaline sibling. Where the alkaline step took the organics, the acid step dissolves the inorganic side: water spots, limescale, mineral deposits. On a heavily contaminated car we also run Purifica in the wash bucket — mechanical action plus dwell time is remarkably effective at lifting inorganic contamination that foam alone won't shift.
Step three: the iron remover. If the paint warrants a full decontamination, we follow with an iron remover — our go-to is Labocosmetica SIDERO, partly because it pulls double duty: alongside the iron chemistry it carries an anti-limescale action, extending the mineral work of the acid step. Iron removers run on thioglycolate chemistry — Bilt Hamber Korrosol's safety data sheet openly declares sodium mercaptoacetate at 15–25%, which is refreshingly honest for this industry. (We compared all nine iron removers we stock, Korrosol included, in our iron remover guide.) The thioglycolate ion attacks the embedded ferrous particle and does two jobs at once: it reduces iron(III) to iron(II), and it chelates that iron into a soluble, deep red-purple complex. Worth being precise here, because almost every source in this industry gets it backwards — the coloured species is ferrous thioglycolate, Fe(II), not ferric. The complex is colourless in acid and develops its purple in alkaline conditions, which is why these products are built on ammonium thioglycolate and mercaptoacetate salts. That purple runoff streaming down the panel isn't theatre — it's the visible signature of the reaction, dissolved iron literally running off your paint. Allow it to dwell, watch the reaction, rinse off. What a clay bar would have to tear out, the chemistry lifts out. Tar, glue and sap are the one family none of these touch — they need a dedicated solvent like MaFra DECA FLASH.
Step four: neutral foam and contact wash. With the aggressive chemistry done, we foam the car with NÈVE — genuinely pH-neutral, phosphate-free — and proceed to the contact wash. Alkaline, acid, neutral: that's the 3-pH system working as designed, each step doing the job the others can't.

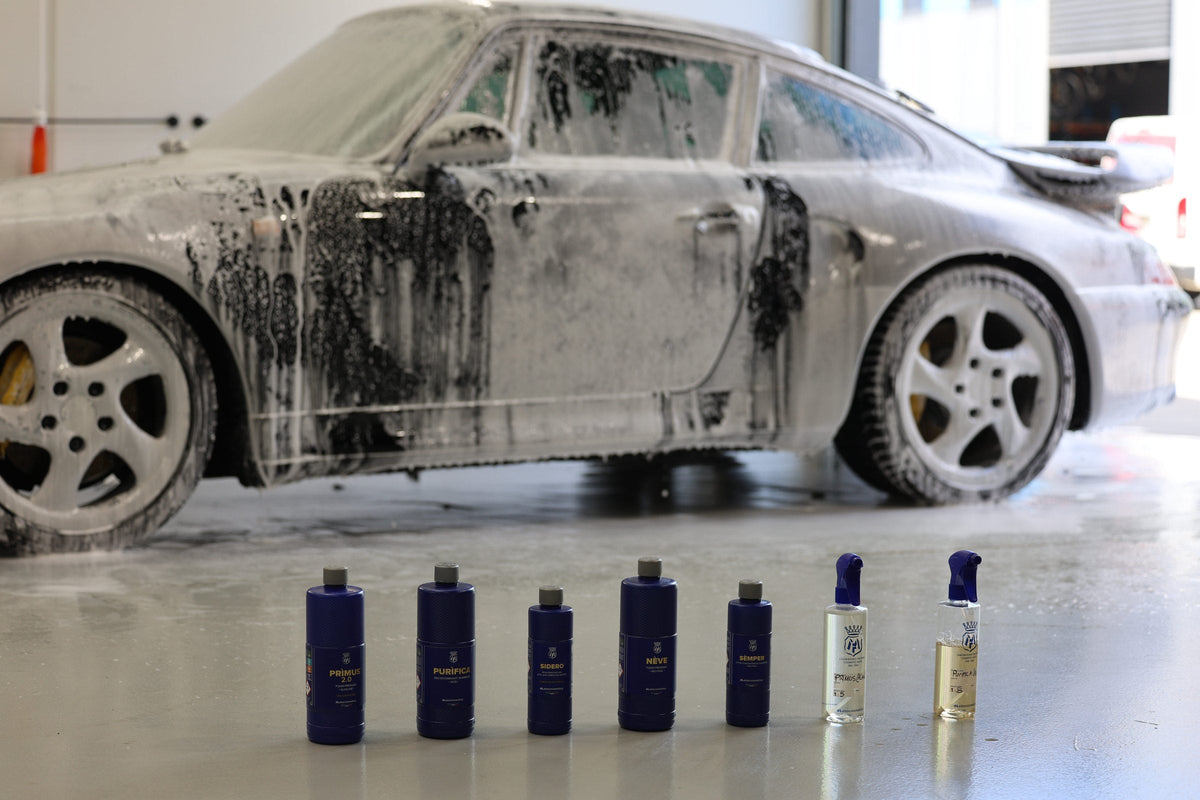
Alkaline, acid, neutral: the 3-pH system, ready to work.
Step five: examine the paint. Now repeat the bag test. Most of the time, the grit is gone — and you've removed it without dragging anything across your clear coat. Only if the panel still feels rough does clay enter the conversation.
Does claying damage your paint? The honest answer
This is where we'll say something some detailers won't like: yes — assume it does. Claying drags abraded contaminants across your paint under pressure, and no matter how good your lubricant and technique are, that process induces fine marring. You often won't see it in the garage. You'll see it in direct sunlight, as a faint haze of micro-scratches. Some very careful detailers on very hard clear coats get away with almost nothing — but "almost nothing" is still something, and on soft paint it can be dramatic.
It's a controversial position, but it's mechanically sound: an abrasive process abrades. That's not a flaw in clay — it's what clay is.
Which leads to our studio rule: we only clay when a machine polish is happening afterwards. Claying is paint-correction prep, not maintenance. If you're correcting, clay with confidence — the polish removes the marring along with the swirls. If you're not planning to polish, stay chemical. A decontaminated car with untouched clear coat beats a "smooth" car wearing fresh micro-marring every time.
Clay bar, clay mitt or clay towel — which should you use?
All three carry the same polymerised rubber technology; the difference is format, and honestly, some of it comes down to personal preference. Here's ours, and why.
We prefer a traditional clay bar, and it's not nostalgia. Real clay comes in graded aggressiveness — from soft through to heavy cut — so you can match the tool to the contamination instead of using one grade for everything. A bar can be kneaded and shaped in your hand, which makes it far easier to manoeuvre around mirrors, door handles, badges and panel edges — the nooks and crannies where mitts and towels are clumsy. And critically, a bar gives you visual feedback: fold it open and you can see exactly what you've pulled out of the paint, then present a fresh clean face and keep working. That feedback loop — seeing the contamination, knowing when the face is loaded — is information a rubberised towel simply doesn't give you as clearly. One non-negotiable with clay: drop it on the ground and it goes in the bin. Embedded grit turns it into sandpaper.
Clay towels and mitts have their place. They're faster across big open panels, they last longer, and unlike a dropped bar, a dropped towel can be rinsed clean and inspected. The DIY Detail Fine Grade Clay Towel is the one we stock because the fine grade keeps the aggression sensible. If a towel is what keeps you claying properly, use the towel — end of the day, it's a personal choice, and we stock both for exactly that reason.
Which clay should you buy?
Bilt Hamber Auto-Clay is our benchmark, and it has one genuine point of difference: it runs on plain water. Almost every clay bar needs a dedicated lubricant. Auto-Clay was engineered to glide on nothing more than clean tap water — no lubricant residue left on the panel to interfere with the polishing step that should follow, and nothing extra to buy. It comes as a generous 200g bar in three grades: Soft for light contamination and softer paints, Regular for typical annual decon work, and Medium in between. Choose the gentlest grade that gets the panel smooth.
Koch Chemie splits the job by colour. The blue RKB mild clay is the gentle, everyday grade, and the red RKR heavy clay is for genuinely neglected paint that's getting corrected regardless. Pair them with CLS Clay Spray, a low-residue lubricant that doesn't need degreasing off afterwards.
Sonax covers the fine end and the machine option. The Sonax Clay Bar is a super-fine grade for delicate work, and the Clay Disc 150 puts clay technology on a machine backing plate for professionals processing serious surface area. For dedicated lubricants, Labocosmetica LUBRIFICA is silane-free and coating-safe, and MIRCH Hydra Essence doubles as a clay lube and iron remover in one pass.
The Alpha Details decontamination order
So here's the routine, end to end. PRÌMUS foamed onto the dry car, dwell, rinse. PURÌFICA foamed on — and into the wash bucket when contamination is heavy. SIDERO or your preferred iron remover where a full decon calls for it, dwelling until the purple reaction has done its work, then rinsed. A final foam of NÈVE and the contact wash. Then — and only then — the bag test decides whether clay is necessary, matched to the lightest grade that gets the panel smooth, and only when a polish is booked to follow it. Chemistry first, abrasion last. Your clear coat is a finite resource; spend it on correction that makes the car better, not on maintenance that slowly sands it away.
Everything mentioned here lives in our decontamination collection, and if you'd rather learn this hands-on, our 3-pH decontamination wash class runs regularly at the Heidelberg West studio. Questions about your specific paint? Send us a message — talking chemistry is kind of our thing.
One last thing on the foam that starts all this. If you're still deciding which pre-wash belongs at the front of that sequence, the number worth reading is the one on the label — an alkaline foam and an acid foam are doing chemically opposite jobs, and a foam sitting quietly near neutral is doing neither. We put six of them side by side on their published pH in our snow foam comparison, so you can see where each one actually sits before it goes anywhere near your paint.

Leave a comment
This site is protected by hCaptcha and the hCaptcha Privacy Policy and Terms of Service apply.